Real before-and-after photos of a Tampa tub surround makeover: dated 4x4 tile to floor-to-ceiling aqua stack, new tub, glass door, vanity. Costs, timeline, lessons.
Most 'before and after' bathroom posts are two renderings and a mood board. This one is a real hall bathroom in a Tampa house, photographed by us from the first walkthrough to the last bead of silicone. It had the exact combination we see week after week across Tampa Bay: an original cream 4x4 tile tub surround, an almond tub, a chrome hand shower, and a strip of black tape along the tub edge — the homeowner's way of marking where the caulk had failed and water was getting behind the wall.
The scope was deliberately tight: keep the tub footprint, take the surround to the ceiling, add a niche and a frameless sliding door, set a new vanity, repaint, and be out in under two weeks. No walls moved, no drains relocated. That restraint is what makes it useful — this is the tub surround remodel most Tampa homeowners actually need, not the spa fantasy. Every photo below is from this one job, in order.
The Starting Point: What Was Wrong
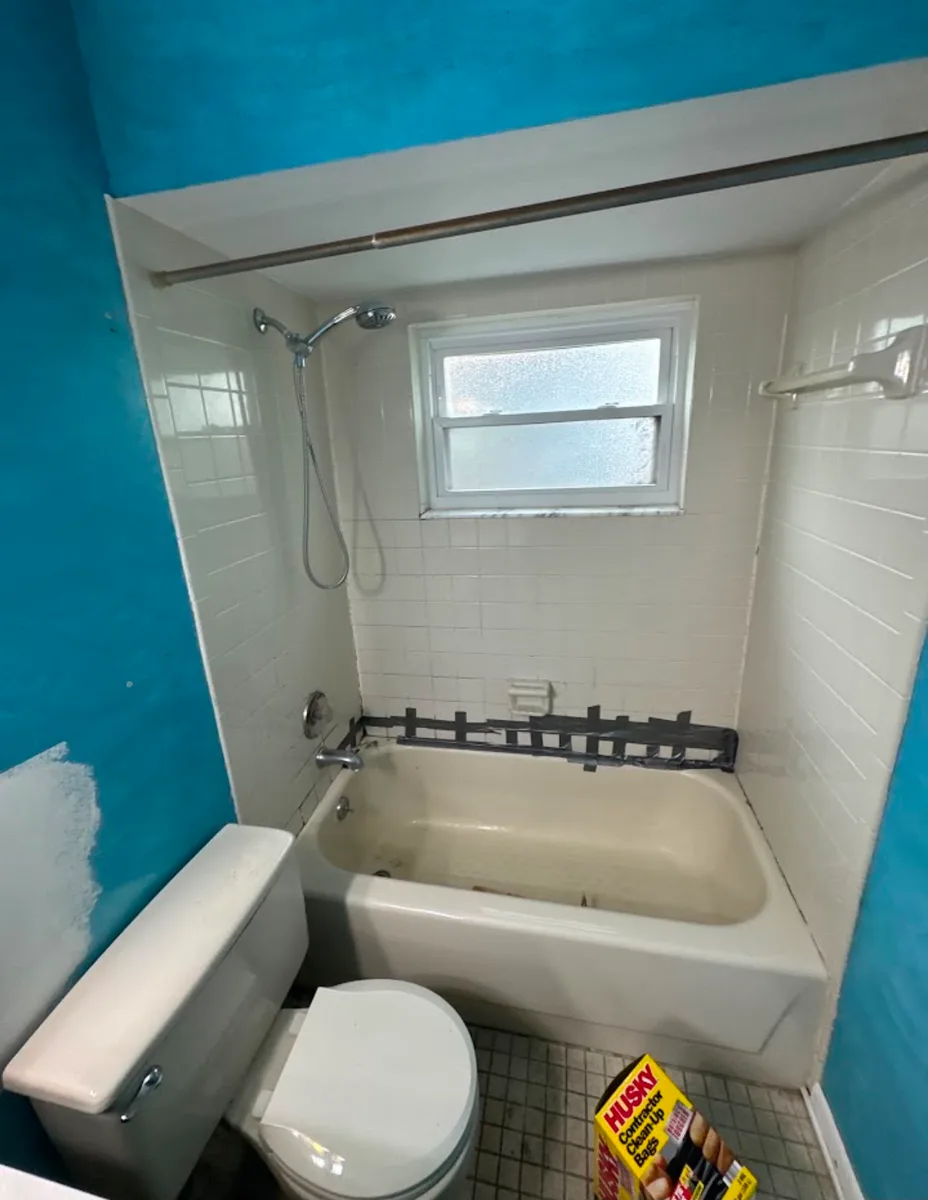
The tile itself wasn't the emergency — original 4x4 wall tile from this era stays stuck for fifty years. The problems were everything around it: a failed, taped-over caulk joint at the tub, an almond tub that dated the room more than anything else in it, walls patched in turquoise and half-primed, an old light bar over the vanity, a frosted window inside the wet zone, and the original 1-inch mosaic floor — worn but solid underfoot.
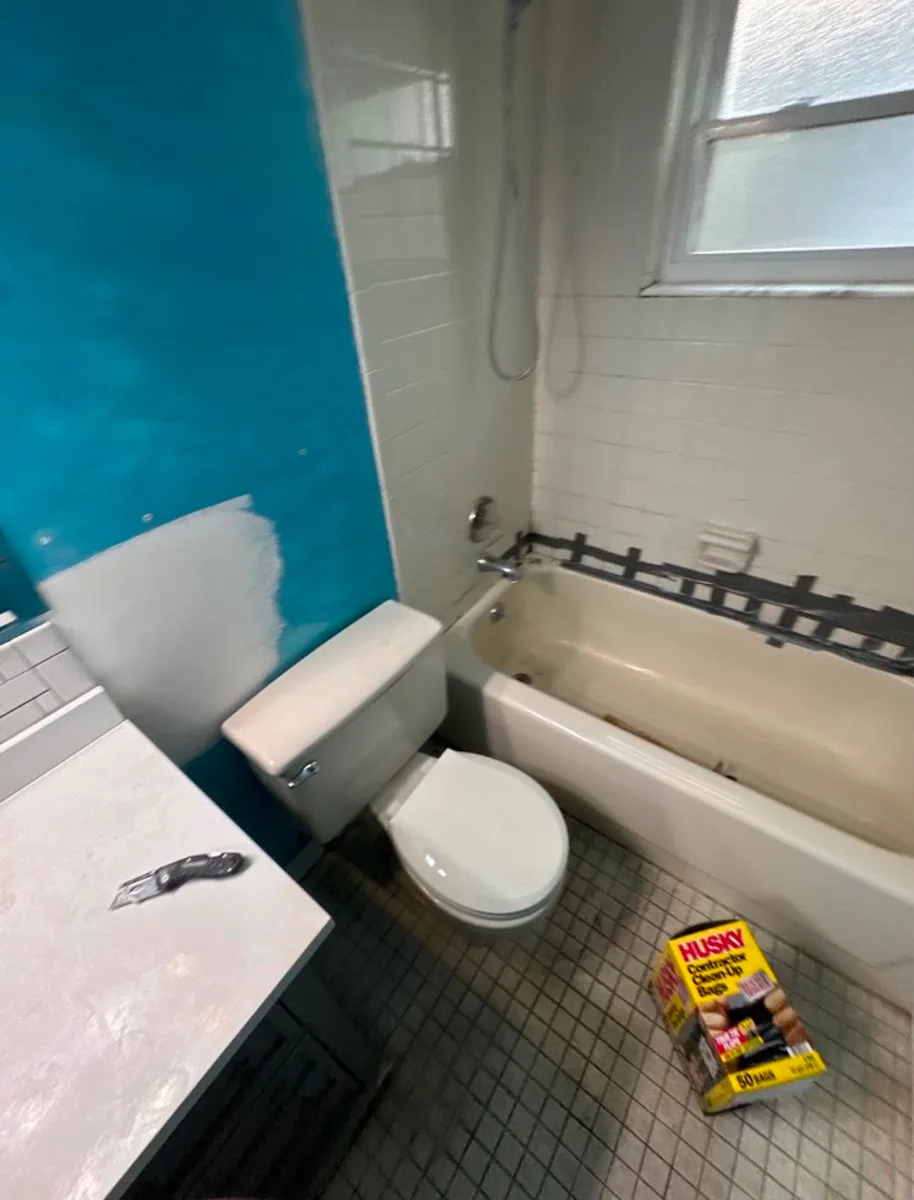
The tape line matters more than it looks. When the tub-to-tile joint opens up, every shower sends water behind the bottom course of tile, and in a closed Tampa hall bath that cavity never really dries. Tape marks the spot; it fixes nothing. A proper re-caulk a year or two earlier would have bought time. By the time we saw it, the only honest question was what the wall behind the tile looked like.
If your seam is at the tape stage but the tile is still sound, this is the fix that buys you time — done right, not with a squeeze tube from the checkout aisle: How to caulk a bathtub the right way
The Plan: Small Room, Big Moves
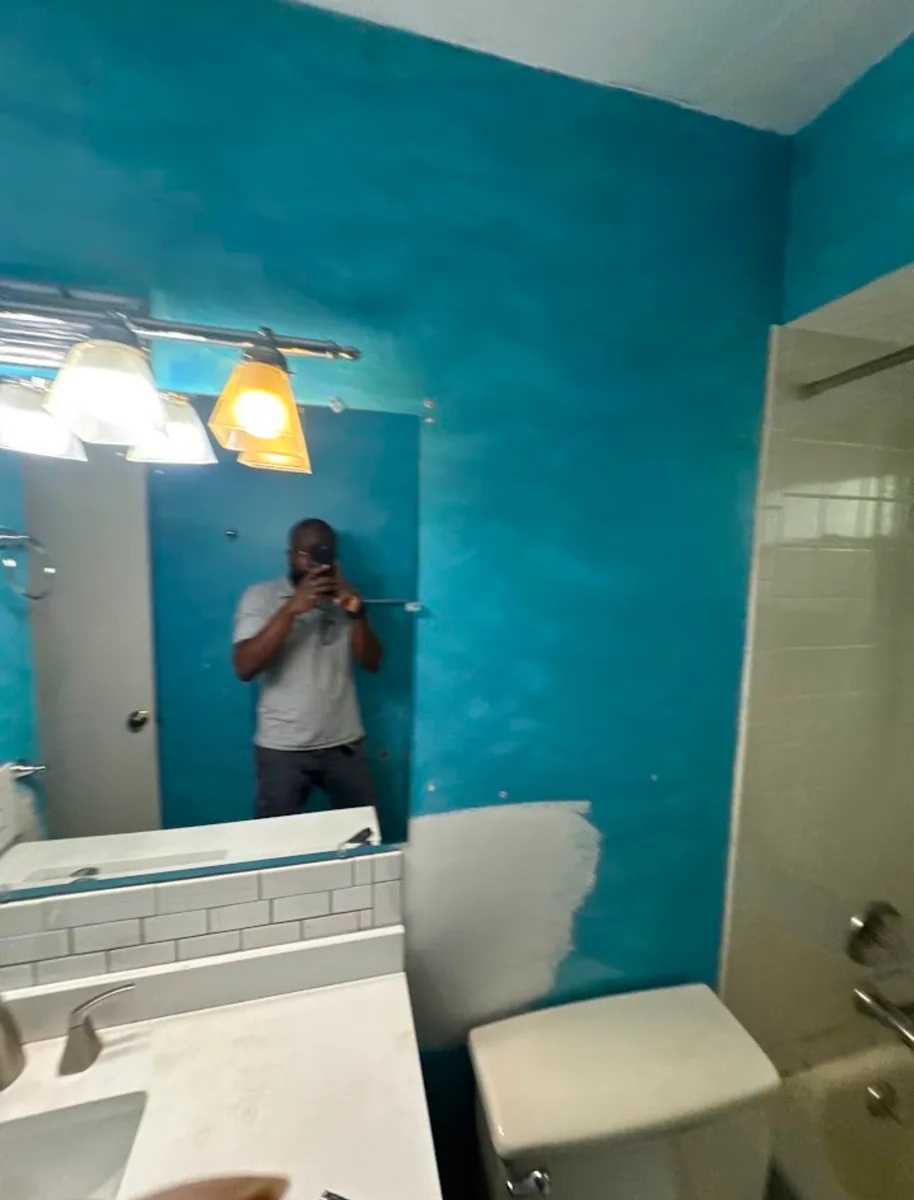
The homeowner's brief was two sentences: make it stop leaking, and make it stop looking like 1978. On a small hall bath, that becomes a short list of decisions, each of which either saves money or spends it on purpose:
- Keep the tub footprint. Same drain, same valve location — the licensed plumber's scope stays predictable and nobody cuts a trench through the slab.
- Take the surround to the ceiling. The old tile stopped short, leaving a painted strip that peels in every humid Tampa bathroom.
- Vertical stack layout with 2x8 tile. Stacked straight up instead of running bond, it pulls the eye toward the ceiling and makes a small room read taller.
- A tiled niche. Bottles off the tub ledge and out of the corner where the caulk failed the first time.
- A frameless sliding glass door instead of a curtain. Light travels through the room, and nothing wet slaps your leg.
- An accent band of the same tile at chair-rail height around the whole room, so the new shower belongs to the bathroom rather than landing in it.
- New gray vanity, white quartz-look top, brushed-nickel widespread faucet — the first thing to go in, ahead of the wet wall. Keep the white subway backsplash — it already worked.
- Prime out the turquoise, fresh white walls, a new toilet. The mosaic floor stays: it was sound, and this budget belonged to the wet wall.
Vertical stack, sea-glass color, handmade-look edges — here's where that choice sits among what we're actually installing in Tampa bathrooms this year: Popular bathroom tile designs for 2026 in Tampa
During: Demo, Substrate, and the Plumber's Day

Day one is demolition — the only day the answer to 'what will this cost' can still change. We sheet the door, run protection down the hall, pull the old surround to the studs, and get the old tub out. This is where every Tampa tub surround rehab either stays on budget or doesn't, because a failed seam has usually been feeding the wall for years: sometimes stained framing that dries and gets treated, sometimes a rotted bottom plate that gets sistered. We carry an allowance for it in every quote; insist on one in yours.
With the wall open, the licensed plumber the project coordinates with had his day: new white tub set and leveled, old valve swapped for a new one behind brushed-nickel rain-and-hand-shower trim, new tub spout, and later the toilet. Depending on where you live in Tampa Bay, a valve replacement can require a permit and an inspection — the City of Tampa, Hillsborough County, and Pinellas each run their own rules, so verify locally before demo. It's also the day for the licensed electrician if the plan includes a recessed light, as this one did.
Then the part nobody photographs but everything depends on: cement backer board on all three walls, seams taped and mudded, every joint and corner sealed with liquid waterproofing membrane, the niche framed and wrapped the same way with its shelf pitched toward the tub. Tile is a shell. What keeps a Tampa shower from doing this all over again in ten years is the waterproofing behind it.
Backer board in the wet zone, moisture-resistant drywall everywhere else — which board goes where in a humid Tampa bathroom, and why the wrong one fails: Water-resistant drywall for Tampa bathrooms
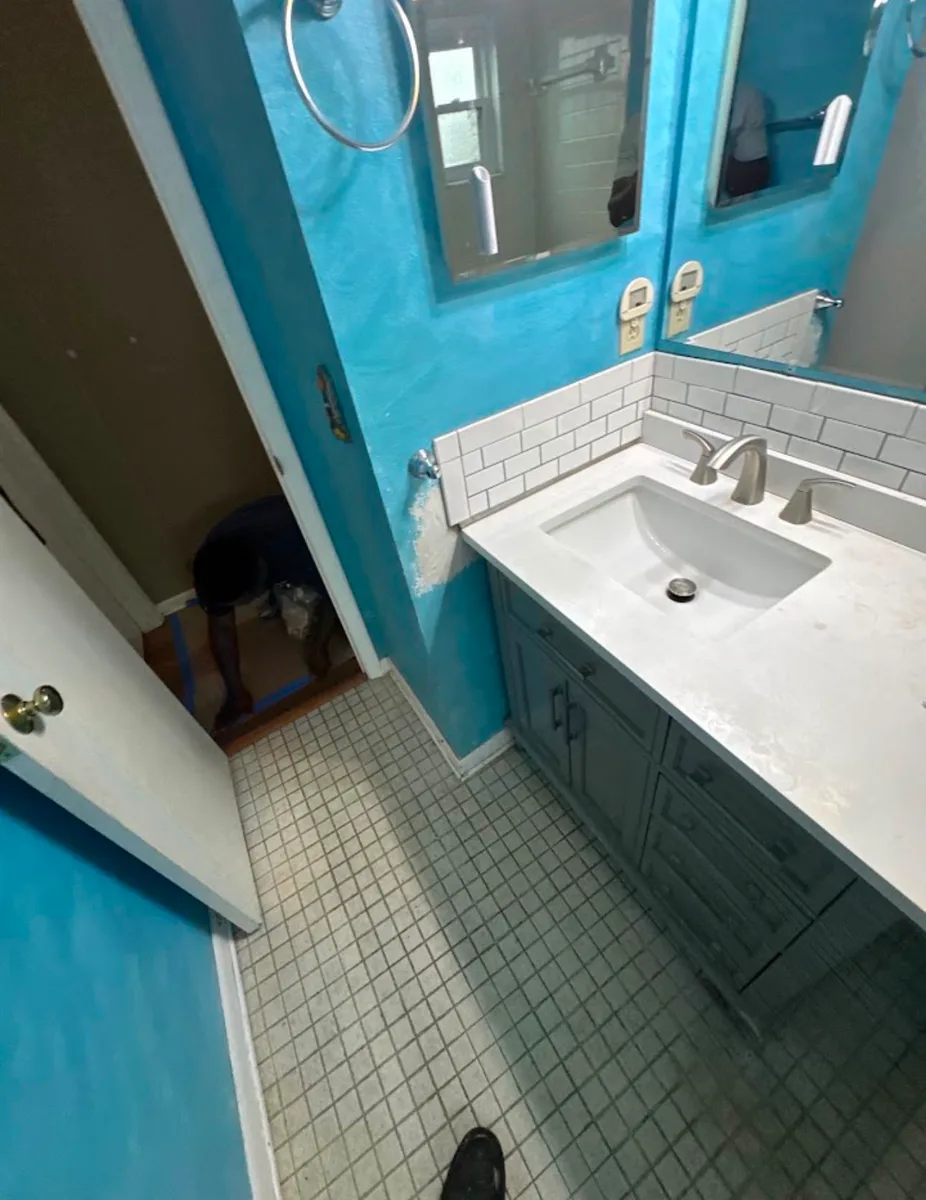
The vanity had gone in first, ahead of the wet wall and while the walls were still turquoise, before priming — plumb, level, shimmed, tight to the subway backsplash — and the plumber made the connections. Then the tile: 2x8 sea-glass tile stacked vertically with leveling clips at every joint, because a stacked layout forgives nothing — every bit of lippage shows from the doorway. Light-gray grout, cured. And the detail that separates a surround that lasts from one that gets taped over again: every change of plane got silicone, not grout. Tub to tile, inside corners, tile to ceiling. Grout cracks where things move; silicone doesn't.
Day-by-day timing for the demo, waterproofing, and tile phases — including what stalls a Tampa job and what speeds it up: How long a shower remodel takes in Tampa
The Reveal
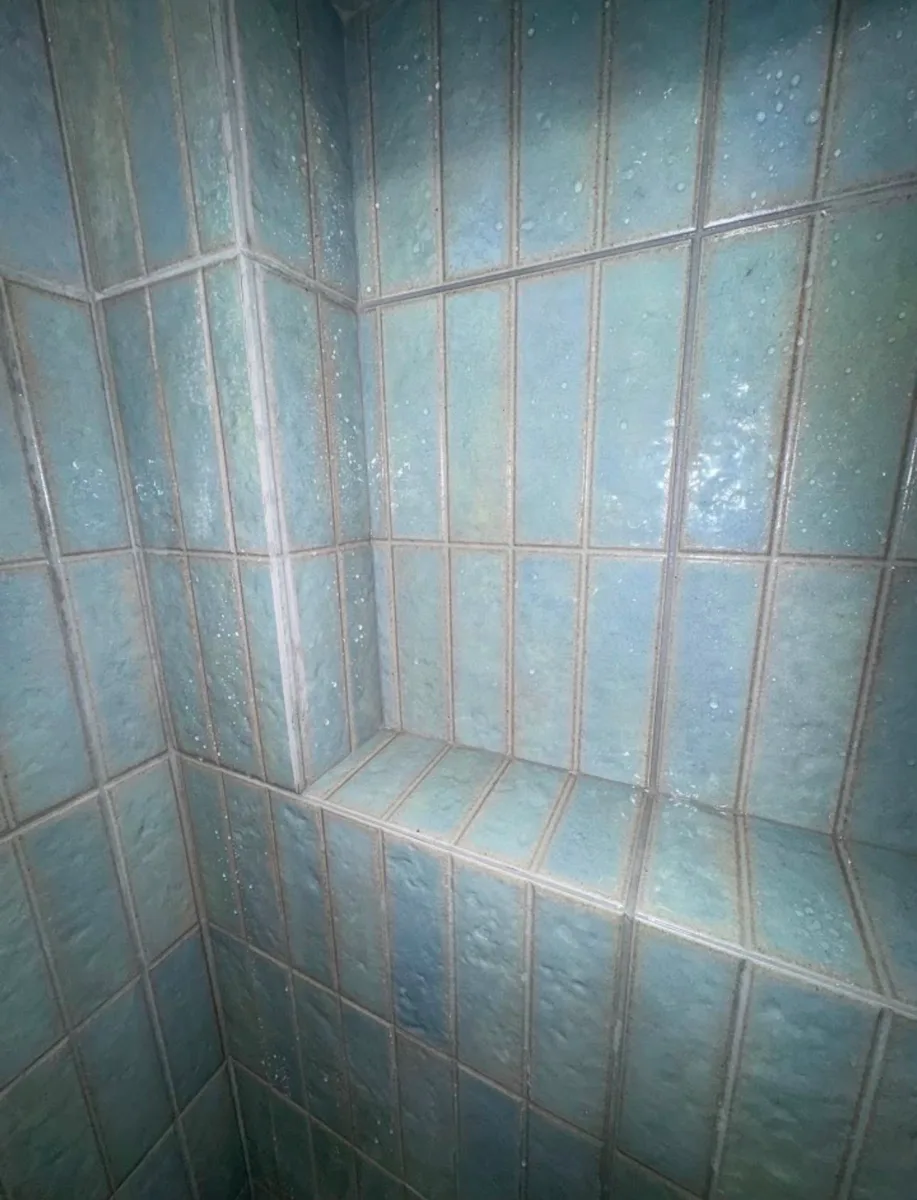
The niche came out exactly as drawn: same tile, same stack, a ledge deep enough for real bottles, and grout lines that run straight through it without a stutter. The sea-glass color reads blue in morning light and green by afternoon — the whole appeal of this tile, and the reason we held a sample at the actual window before ordering a box.
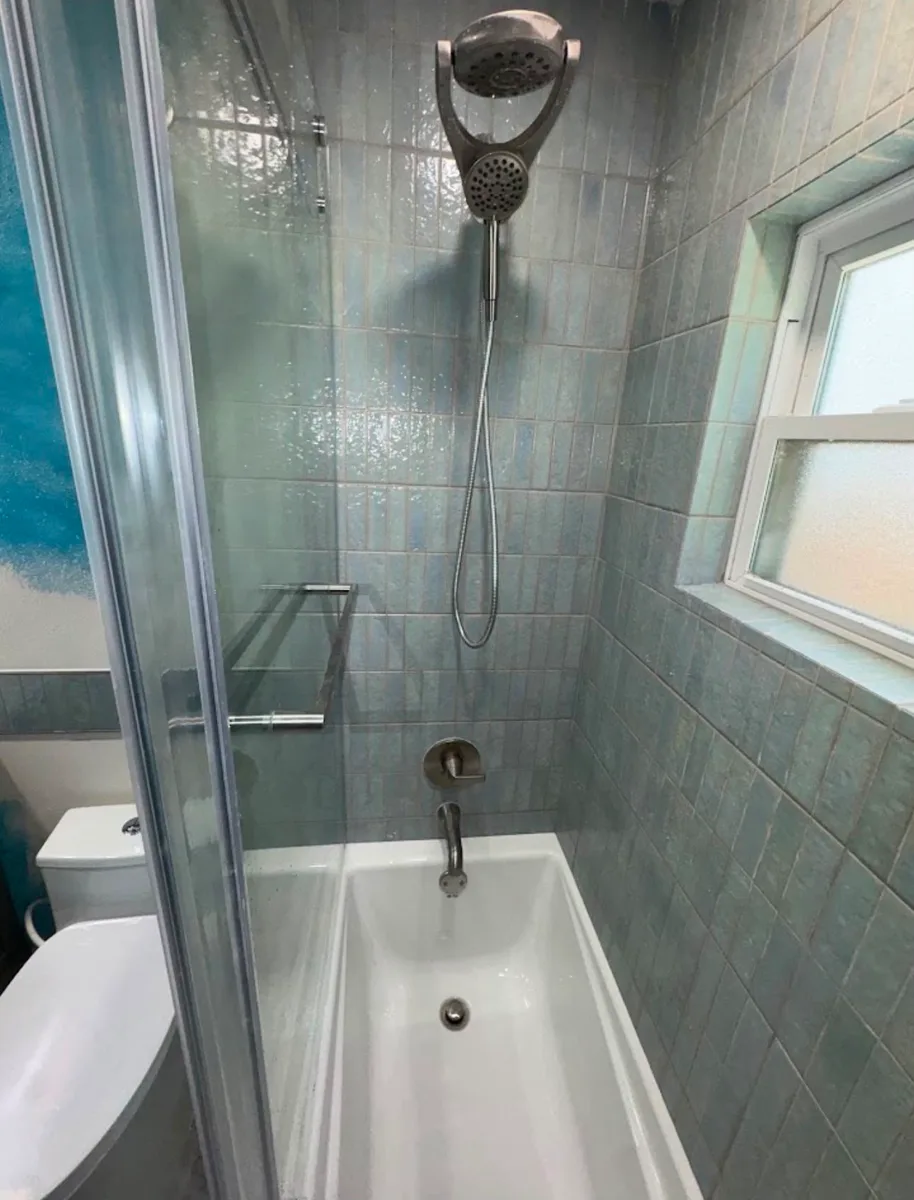
From the tub, you can see what the height did for the room: no paint line, no peeling strip, no visual stop halfway up the wall. The frosted window stayed exactly where it was, now framed in tile. Brushed-nickel valve trim, tub spout, and a rain-and-hand-shower combo replaced the old chrome hand shower; a towel bar on the glass door sits within reach. And a new white tub replaced the almond one.
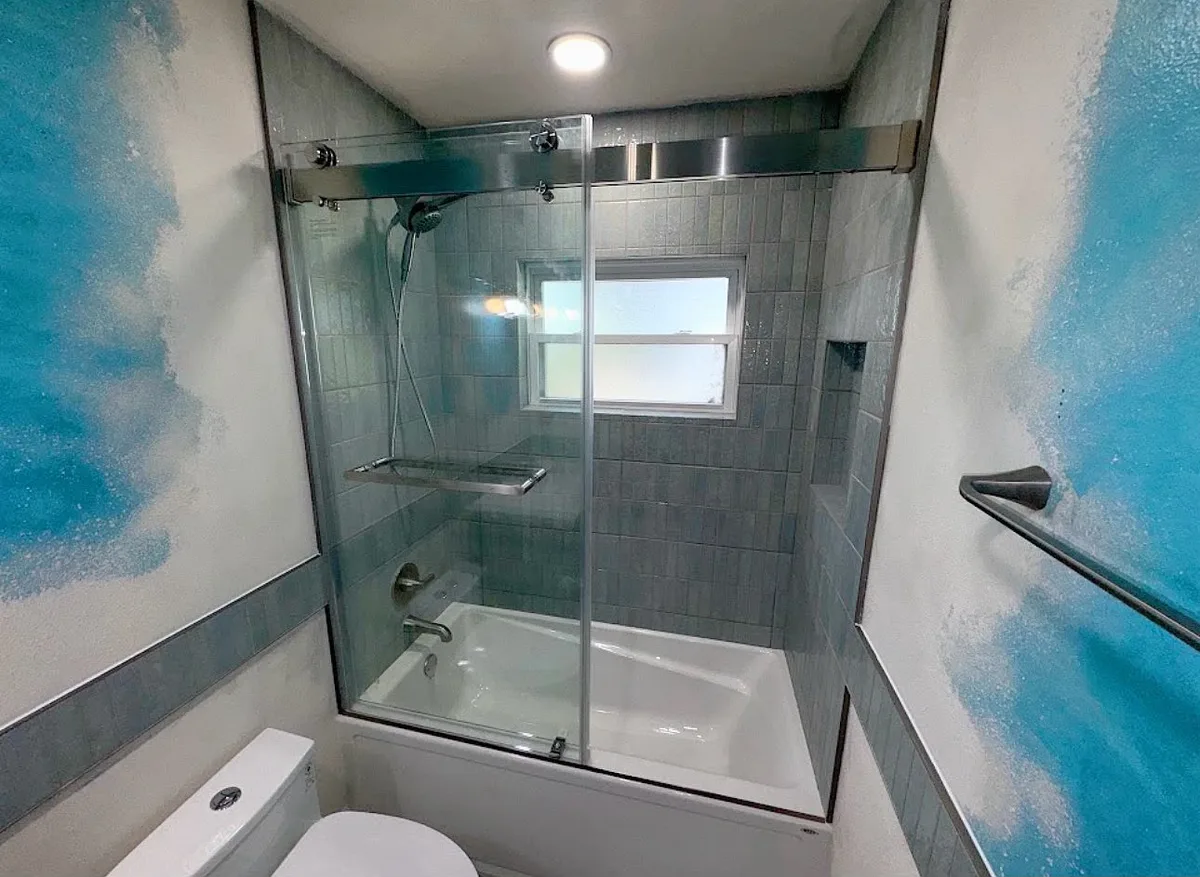
And the room once the tile and glass were in: frameless brushed-nickel slider, a recessed light overhead, the turquoise walls primed and ready for their final coat, a new toilet — and the accent band that carries the shower tile around the room at chair-rail height, tying the wet wall to everything else. That band cost less than a day of labor and a couple of boxes of tile, and it's the reason the room looks designed instead of merely repaired.
What This Project Cost and How Long It Took
We don't publish one client's invoice, but here are honest 2026 Tampa Bay ranges for this exact scope — surround replaced to the ceiling with a niche, new tub, frameless slider, new vanity, and paint. Each line lands in the low-to-mid four figures; the tile and the plumber's day are the swing lines:
- Tile surround — demo to the studs, cement board, waterproofing membrane, tile to the ceiling with a niche, grout and silicone: $3,500–$8,000. Stock ceramic sits at the low end; handmade-look 2x8 in a color, stacked, with a niche pushes toward the top.
- New tub, including removal and the licensed plumber's drain hookup: $1,500–$3,500. The plumber's valve, trim, and spout work: $500–$1,200 plus fixtures. A toilet swap rides along on the same trip.
- Frameless-look sliding glass tub door, installed: $900–$1,800. Stock 60-inch sliders sit at the bottom; heavier glass and custom sizes climb.
- Vanity, quartz-look top, and widespread faucet, installed: $600–$3,000 depending on width, top, and cabinet grade.
- Priming out a saturated color and painting walls, ceiling, and trim in a bath-rated paint: $600–$1,250.
All in, this scope in Tampa typically lands between $7,500 and $16,000, with most jobs in the $9,000–$13,000 middle. Four things move it: the tile you fall in love with, the glass door, how much of the plumber's day you need, and what's behind the old tile when it comes off — carry a $500–$3,000 allowance for that last one. Timeline: one to two weeks. Demo and plumbing rough-in take the first day or two, backer board and waterproofing follow, tile and grout run three to four days, then trim and silicone. Glass is measured after grout; a stock-size slider like this one goes in within days, while custom frameless glass adds a one-to-two-week wait.
The full 2026 breakdown by scope — refresh, surround rehab, conversion, gut — with component prices and where handyman pricing sits against a general contractor's: Bathroom renovation cost in Tampa, 2026
Why Tampa Bathrooms Like This One Fail Early
This bathroom is typical of the housing stock we work in every week: a modest concrete-block home from the 1950s-to-70s wave that built out Hillsborough and Pinellas, with a hall bath that still had its original tile. Those surrounds were built well — mud-set tile on furred-out block or the greenboard of the day — but for a different life. Fifty years of Tampa humidity in a small closed room with a window inside the wet zone, hard water that etches grout and pits chrome, one failed caulk joint left long enough, and the assembly behind the tile quietly gives up while the tile face still looks fine. Add a repaint every few years over walls that never fully dry, and you get the before photos.
We've rebuilt versions of this exact bathroom in Seminole Heights bungalows, Carrollwood ranches, Temple Terrace block homes, older Brandon subdivisions, and St. Petersburg's mid-century neighborhoods. The details change — cast-iron tubs in some, steel in others, a window in the surround more often than not — but the diagnosis is the same nine times out of ten: sound tile, failed seams, and a wall that has been wet longer than anyone knew.
Small-Bathroom Design Moves That Worked
- Vertical stack tile. The cheapest way to add visual height to a low, narrow tub bay — same tile, same labor, different direction.
- Tile to the ceiling. No paint line, no peeling, and the tub bay reads as one tall volume.
- A frameless slider over a curtain. The room gets its light and depth back; a curtain visually cuts a small bathroom in half.
- One tile, used twice. The chair-rail accent band is the same tile as the surround — nothing to coordinate, and the eye reads the room as a whole.
- Light-gray grout. Hides Tampa hard-water haze better than white and doesn't turn a stacked layout into a grid of dark lines.
- Brushed nickel on the wet-wall trim and door. Warmer than chrome against blue-green tile, and it forgives water spots — which matters here more than in most cities.
- Kept the window, the backsplash, and the floor. Three things still doing their jobs, and three lines the budget didn't have to carry.
Lessons for Your Own Bathroom
First: tape is a diagnosis, not a repair. If a seam has failed at the tub, the question isn't whether to caulk it — it's how long it has been open; have someone tap the bottom courses before you commit to a cosmetic fix. Second: keep the footprint if you possibly can; every dollar not spent moving a drain through a slab goes into tile you can see. Third: order the tile and the door before demo — backorders turn a ten-day job into a three-week one. Fourth: budget an allowance for what's behind the tile and be pleasantly surprised. Fifth: spend on the layer nobody sees. Waterproofing membrane and silicone at every joint cost a few hundred dollars and are the difference between doing this once and doing it again in ten years.
Frequently asked questions
- How much does it cost to replace a tub surround with tile in Tampa?
- For a full replacement to the ceiling — demo, cement board, waterproofing, new tile with a niche, grout and silicone — plan on roughly $3,500–$8,000, with the tile you choose as the biggest variable. Add a new tub and the licensed plumber's valve and trim work and the wet wall alone typically runs $5,500–$12,500. A frameless-look slider, new vanity, and paint push the whole room to $7,500–$16,000, with most jobs landing between $9,000 and $13,000.
- How long does a tub surround remodel take?
- One to two weeks for the scope shown here. Demo and the plumber's rough-in take the first day or two, backer board and waterproofing follow, tile and grout run three to four days, and trim, silicone, and the door close it out. Custom frameless glass adds a fabrication wait of a week or two; a stock-size sliding door does not.
- Can you retile a tub surround without replacing the tub?
- Yes, and it's common when the tub is sound. The surround comes off to the studs, the walls are rebuilt with backer board and waterproofing, and new tile is set to a carefully protected tub. If the tub is worn, chipped, or the wrong color for the new tile, replacing it while the wall is already open is the cheapest it will ever be.
- Do I need a permit to replace a tub surround in Tampa?
- Cosmetic tile replacement over an existing tub generally does not, but swapping the shower valve or moving any plumbing often does, and the rules differ between the City of Tampa, unincorporated Hillsborough, and Pinellas. Ask your building department or have your contractor confirm before demo. The permit and the licensed plumber travel together.
- Is vertically stacked tile a good idea in a small bathroom?
- It's one of the best moves for a low or narrow tub bay: the vertical lines carry the eye upward and make the room feel taller without changing a single dimension. The trade-off is that a stacked layout shows every misalignment, so it demands flat walls, a leveling system, and a setter who cares. Done right, it looks intentional for decades; done sloppy, it looks crooked from the doorway.
Tub surround replacement, tile, glass, vanities, and paint — with licensed plumbers and electricians coordinated for the parts that need them: Bathroom remodeling in Tampa
Have a taped-over seam and a tub surround older than you are? Fenelon Handyman Services rebuilds tub surrounds and small bathrooms across Tampa Bay — waterproofed right, tiled straight, and finished in one to two weeks. Call (786) 509-5555 for a free quote. Get a free tub surround remodel quote.
Bathroom Remodeling in Tampa, FL
Done-for-you by an insured local crew — free quotes, same-week scheduling.
Need a hand with this in Tampa?
Get a free quote from a 4.8★ local crew. We answer fast and show up on time.
We handle this kind of work across Tampa Bay — including handyman service in Lakeland, handyman service in Oak Forest, handyman service in Tampa Palms and handyman service in Hunter's Green. See all service areas.