How to fix a cracked tile in your Tampa home — hairline crack repair without removal, full tile replacement step by step, matching grout, and why Florida slab homes crack tile in the first place.
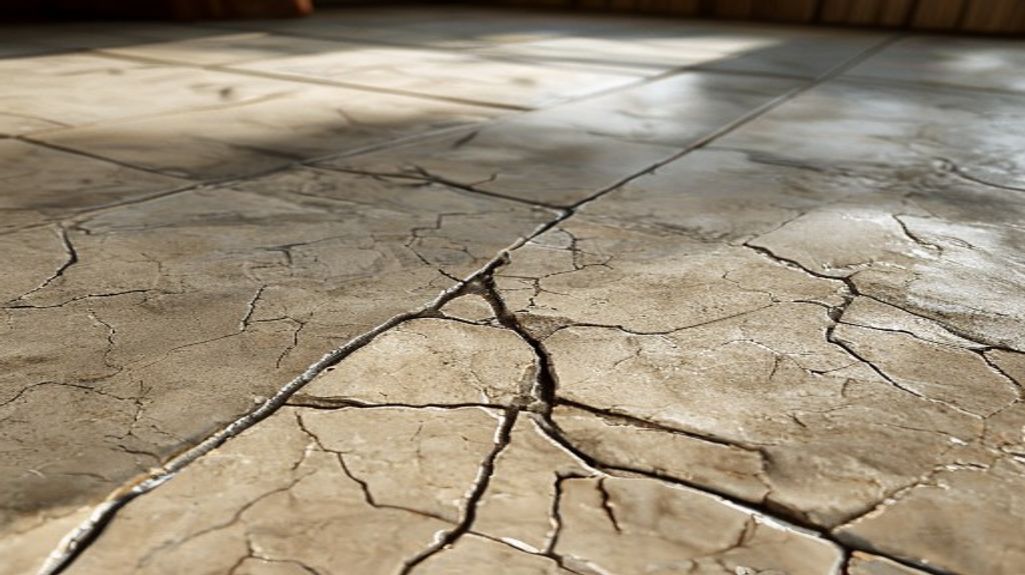
A cracked tile rarely stays a cosmetic problem for long. The crack catches dirt, becomes a trip hazard underfoot, and — especially in a kitchen, bathroom, or laundry room — lets water seep into the grout and substrate below, where it can spread damage you can't see. The good news is that most single cracked tiles are a very fixable DIY job. Here's how to do it right, plus a Tampa-specific question worth asking first: why did it crack?
First, Why Do Tiles Crack in Tampa Homes?
This is the step most national guides skip, and it matters here. Most Tampa homes are built slab-on-grade — tile set directly over a concrete slab — and that changes why tiles crack and what a crack can be telling you:
- Impact: a dropped pan, a heavy piece of furniture, or a hard knock — the most common cause of a single cracked tile, and the easiest to fix.
- Slab movement: Florida's sandy soils and high water table cause slabs to shift and develop hairline cracks. When a slab crack moves, it telegraphs straight up through the tile and grout above it — often as a long, straight crack crossing several tiles in a row.
- Hollow-set tiles (lippage): if a tile wasn't fully bedded in mortar during installation, there's an air void beneath it. Tap it — a hollow sound means an unsupported tile that cracks under normal foot traffic.
- Subfloor or substrate movement: on raised-floor or second-story tile, flex in the subfloor cracks tile and grout.
- Moisture and trapped water: in Tampa's humidity, water that gets under tile (from a slow leak or failed grout) can undermine the bond and lead to cracking and loose tiles.
The key diagnostic: one cracked tile is almost always a simple repair. Several tiles cracking in a line, recurring cracks in the same spot, or tiles that sound hollow point to a problem underneath — and fixing only the surface will just let it crack again. We'll come back to that at the end.
Option 1: Fix a Hairline Crack Without Removing the Tile
For a thin hairline crack in a tile that's still solid and well-bonded (no movement, no hollow sound), you can often repair it in place — no demolition required:
- 1. Clean the crack. Wipe the tile and work any dust out of the crack with a dry brush. The surface must be clean and completely dry — easy to rush in a humid Tampa bathroom, but moisture ruins the bond.
- 2. Fill with clear epoxy. Apply a two-part clear epoxy along the crack with a toothpick or fine applicator, working it down into the line. Epoxy bonds the edges and seals out water.
- 3. Smooth and remove excess. Wipe away overflow with a damp cloth before it sets, keeping the filler flush with the tile surface.
- 4. Match the color (optional). For a near-invisible repair, tint the epoxy to the tile color, or after curing, dab on matching tile paint and seal with a clear glaze.
- 5. Let it cure fully. Follow the epoxy's cure time before walking on it or getting it wet — usually 24 hours.
This is a genuine fix for hairline cracks, but it's cosmetic — it won't hold if the tile is moving or unsupported. If the crack reopens, the tile needs replacing.
Option 2: Replace a Cracked Tile (Step by Step)
For a tile that's badly cracked, broken into pieces, loose, or hollow-sounding, replacement is the real fix. Here's the full process:
What you'll need
- A matching replacement tile (more on finding one below), grout to match, thin-set mortar or tile adhesive, a grout float, a margin trowel, a grout saw or oscillating tool, safety glasses, and gloves.
The steps
- 1. Remove the grout around the tile. Use a grout saw or an oscillating multi-tool to clear the grout lines surrounding the cracked tile, isolating it from its neighbors so you don't damage them.
- 2. Break out the old tile. Score an X across the tile, then carefully chip it out from the center outward with a chisel and hammer. Wear safety glasses — tile shards are sharp. Work toward the center to protect surrounding tiles.
- 3. Scrape the bed clean. Remove all old mortar/adhesive from the substrate so the new tile sits flush and fully supported. A hollow or uneven bed is what cracked the last tile — don't repeat it.
- 4. Dry-fit the new tile. Set it in place without adhesive to confirm it sits flush and the grout gaps are even.
- 5. Set the new tile. Spread thin-set or adhesive on the back (back-buttering) and/or the bed, press the tile in firmly with a slight twist to fully seat it, and check that it's level with the surrounding tiles. Use tile spacers to keep the grout lines even.
- 6. Let the adhesive cure. Wait the full cure time (usually 24 hours) before grouting — rushing this is the most common DIY mistake.
- 7. Grout the lines. Pack matching grout into the lines with a float held at an angle, wipe off the excess diagonally with a damp sponge, and let it haze over before a final buff.
- 8. Seal the grout. In a Tampa bathroom, kitchen, or laundry, seal the new grout once it cures to lock out moisture — important in our humidity.
Loose grout or staining beyond just the cracked tile? Our regrout guide covers when to patch vs. redo the whole floor: Tile Repair and Regrouting in Tampa: When to Patch vs. Redo
Finding a Matching Replacement Tile in Tampa
The hardest part of a tile replacement is often the match. A few tips:
- Check for leftovers first. Many Tampa builders leave a box of spare tiles in the garage or attic — check there before shopping.
- Bring a piece to the store. Take a chip of the broken tile (or a clear photo with a size reference) to a local tile shop or home center to match color, size, and finish.
- Accept 'close enough' in low-visibility spots. Under an appliance or in a closet, a near-match is fine. In the center of a main floor, a poor match stands out more than the original crack did.
- Pull from a hidden spot. If you can't find a match, harvest a tile from a closet, pantry, or under the refrigerator and put the imperfect new tile there instead.
When a Cracked Tile Means a Bigger Problem
Come back to the diagnosis. Replacing a tile only fixes the surface — if something underneath caused the crack, a new tile will crack too. Call a professional before (or instead of) a DIY patch when you see:
- A long, straight crack running through several tiles in a line — a classic sign of a slab or substrate crack moving underneath, common in Tampa slab homes.
- Tiles that crack again in the same spot after a repair.
- Multiple hollow-sounding or loose tiles, which point to a failed mortar bond across an area.
- Cracking near a known plumbing line, a shower, or a spot where you suspect a slow leak — water under the tile needs to be addressed first.
- Cracks paired with doors that suddenly stick or new wall cracks, which can indicate slab or foundation movement worth evaluating.
In those cases the fix isn't the tile — it's what's beneath it, which may mean an isolation membrane, substrate repair, or addressing a moisture source before re-tiling. A typical single cracked-tile replacement in Tampa runs $150–$350 depending on tile type, location, and how hard the tile is to match; larger areas or substrate issues are quoted after a look.
For cracked, loose, or water-damaged tile beyond a quick DIY fix, here's what our tile repair service covers: Tile Repair Services in Tampa
Frequently asked questions
- Can you fix a cracked tile without replacing it?
- Yes, for a thin hairline crack in a tile that's still solid and well-bonded. Clean and dry the crack, fill it with clear two-part epoxy, smooth it flush, and optionally color-match with tile paint and a glaze. It's a real fix for hairline cracks, but it's cosmetic — if the tile is loose, hollow, or moving, it needs to be replaced.
- Why do my floor tiles keep cracking in the same place?
- Recurring cracks in the same spot almost always mean the problem is underneath the tile, not the tile itself. In Tampa's slab-on-grade homes, a moving slab crack telegraphs up through the tile above it, so a simple replacement just cracks again. The real fix addresses the substrate — often an isolation membrane or substrate repair — before re-tiling.
- How do I find a replacement tile that matches?
- Check the garage or attic first — many Tampa builders leave spare tiles. If not, bring a chip of the broken tile (or a clear photo with a size reference) to a local tile shop to match color, size, and finish. If you can't get a good match, pull a tile from a hidden spot like a closet and put the imperfect new one there.
- Is a cracked tile a serious problem?
- A single cracked tile from an impact is usually just cosmetic and a quick fix, but it can let water into the substrate over time — worth sealing or repairing, especially in a kitchen or bath. Several tiles cracking in a line, recurring cracks, or hollow-sounding tiles can signal a slab or substrate issue that should be evaluated before it spreads.
- Does Fenelon Handyman repair cracked and loose tile in Tampa?
- Yes — cracked tile replacement, loose-tile re-setting, regrouting, and matching repairs are routine for us across Tampa Bay, on floors and walls. We also diagnose whether a crack is just surface damage or a sign of a substrate or moisture problem underneath, so it's fixed for good. Call or text (786) 509-5555.
Cracked, loose, or hard-to-match tile? Call or text (786) 509-5555 for a fast, insured Tampa handyman who'll fix it right — and tell you if there's something underneath. See our tile repair services.
Tile Repair in Tampa, FL
Done-for-you by an insured local crew — free quotes, same-week scheduling.
Need a hand with this in Tampa?
Get a free quote from a 4.8★ local crew. We answer fast and show up on time.
We handle this kind of work across Tampa Bay — including handyman service in Thonotosassa, handyman service in Odessa, handyman service in Lakeland and handyman service in Oak Forest. See all service areas.