Why floating shelves fall — and how to install them so they hold. Finding studs, choosing brackets, weight limits, mounting on tile and concrete block, and leveling, for Tampa homes.
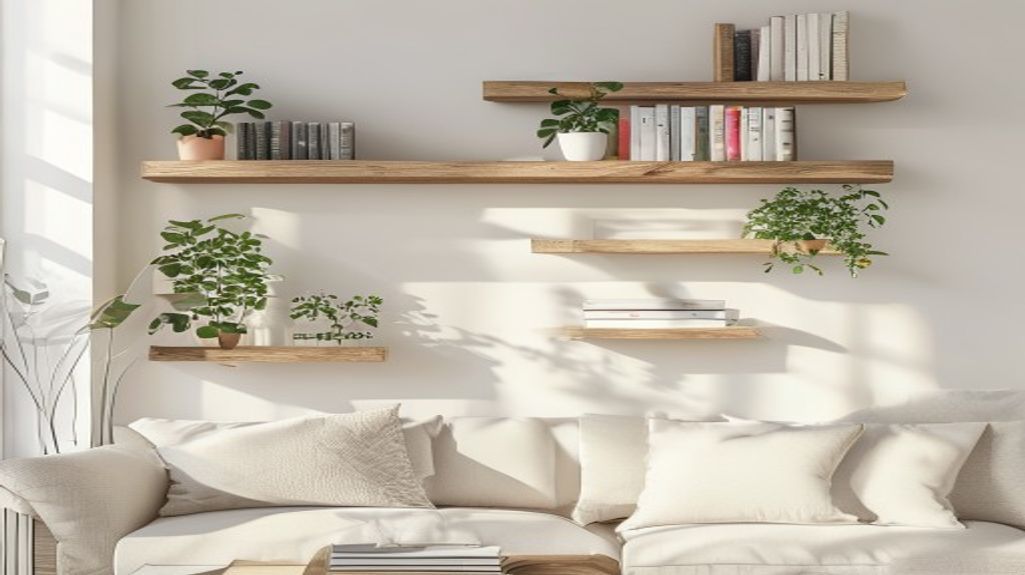
Floating shelves are everywhere in Tampa homes right now — over sofas, beside TVs, in kitchens and bathrooms, flanking fireplaces. The clean, bracket-free look is the whole appeal. But that hidden hardware is also why they're one of the most common DIY jobs we get called to fix: a shelf that was loaded with books or dishes slowly works its anchors loose in the drywall, then lets go — usually weeks after it was installed, and usually all at once.
The good news: floating shelves are very installable as a DIY project if you respect one principle — the shelf is only as strong as what the bracket is anchored to. Here's how to do it so it holds for years, including the stud and concrete-block details specific to Tampa walls.
Why Floating Shelves Fall
Almost every floating-shelf failure traces back to the same cause: the bracket was anchored into hollow drywall instead of solid framing. A floating shelf creates leverage — the further out the load sits from the wall, the more force it pulls down and out on the top anchors. Drywall anchors feel solid when you install them, but under constant outward leverage they slowly enlarge their hole and let go. Add a few heavy books or a stack of plates and the failure comes sooner.
The fix is simple: get the bracket screws into studs, or into concrete block with masonry anchors. Done that way, a floating shelf can hold far more than most people expect.
Step 1: Find Your Studs (or Confirm It's Block)
Before anything else, figure out what's behind the wall. Use a stud finder to locate framing on interior drywall walls. If the wall reads solid everywhere — common on Tampa exterior walls — you're on concrete block, and you'll anchor differently (covered below).
- Mark every stud that falls within your shelf's length. Studs are usually 16 inches apart, so a 36-inch shelf will typically cross two studs.
- Plan the shelf position so the bracket can hit at least one — ideally two — studs. If your chosen spot only crosses one stud, you can combine a stud screw with a rated heavy-duty anchor at the other points.
- Mark stud centers at the exact height your bracket holes will land.
New to finding studs? Our step-by-step guide covers it (and the Tampa block-wall twist): How to Use a Stud Finder: A Tampa Homeowner's Guide
Step 2: Choose the Right Shelf and Bracket
- Floating shelves with a concealed metal bracket (a backplate with rods that the shelf slides onto) are the strongest type — the backplate spans multiple anchor points and distributes the load.
- Match the shelf to the load. A decorative shelf for a few light items is forgiving; a kitchen shelf holding plates or a long shelf carrying a row of books needs a heavy-duty bracket screwed into studs or block.
- Check the rated capacity. Quality floating shelves list a weight rating that assumes proper anchoring. That rating disappears if you mount into drywall alone.
- Longer shelves need more anchor points. Don't span a 48-inch shelf on two anchors — use the full bracket and hit every stud you can.
Step 3: Mount It Level and Solid
- 1. Mark and level. Hold the bracket (or backplate) at your height, set a level on it, and mark the screw holes once it's perfectly horizontal. On a long shelf, even a slight tilt is very visible.
- 2. Drill pilot holes at the studs. A pilot hole prevents splitting the framing and makes driving the screw easier.
- 3. Use long enough screws. The screw has to pass through drywall and still get solid bite into the stud — usually 2.5–3 inches. The short screws in the box are often only long enough for drywall; upgrade them.
- 4. Drive the screws snug, check level again, then mount the shelf onto the bracket.
- 5. Load it gradually and test. Put weight on it before trusting it with anything breakable. A correctly anchored shelf won't sag, tilt, or pull at the top edge.
Floating Shelves on Tile or Concrete Block in Tampa
Kitchen-backsplash shelves, bathroom shelves, and shelves on exterior walls often land on tile or concrete block instead of wood framing. Block actually makes a stronger shelf mount than drywall-and-studs — you just need the right approach:
- Drill through tile with a diamond or carbide bit at low speed, then into the block with a masonry bit and a hammer drill.
- Anchor with masonry anchors (sleeve anchors or heavy-duty Tapcons) sized for the shelf's load — not drywall anchors.
- On a tile backsplash, tape the drill spot and go slow to avoid cracking the glaze.
- Seal holes in wet areas (bathroom, behind a sink) with a dab of silicone before mounting.
When to Call a Pro
Floating shelves are a great DIY project on a straightforward interior wall. It's worth calling a handyman when:
- The shelf has to go where there's no stud and will depend on anchors — especially if it'll carry real weight.
- You're mounting on tile or concrete block and don't have a hammer drill, masonry bits, and the right anchors.
- You want a row of perfectly aligned shelves, or long shelves where leveling and stud spacing get fussy.
- It's a heavy installation (a thick live-edge shelf, a mantel, or a shelf that'll hold a sound system or stacked dishware).
A typical floating-shelf installation in Tampa runs $75–$200 depending on the number of shelves, the wall type, and whether tile or block drilling is needed — and it comes with the one thing a wobbly DIY shelf doesn't: confidence it'll still be on the wall next year.
Shelves, built-ins, mantels, and trim — see our finish carpentry work: Trim & Finish Carpentry in Tampa
Frequently asked questions
- Why do floating shelves keep falling off my wall?
- Almost always because they were anchored into hollow drywall instead of studs. A floating shelf creates outward leverage that slowly works drywall anchors loose until they let go — often weeks later and all at once. The fix is to screw the bracket into studs, or into concrete block with masonry anchors.
- How much weight can a floating shelf hold?
- It depends entirely on the anchoring. Mounted into studs or solid block with a quality concealed bracket, a floating shelf can hold 40–75+ pounds. Mounted into drywall alone, even a low-rated load will eventually pull it out. The shelf's listed rating assumes proper anchoring into solid material.
- Do I need to hit a stud for floating shelves?
- For anything carrying real weight, yes — anchor into at least one stud, ideally two. If your shelf position only crosses one stud, combine a stud screw with rated heavy-duty anchors at the other points. On concrete-block walls (common in Tampa), use masonry anchors instead.
- Can floating shelves be mounted on a tile backsplash or block wall?
- Yes. Tile over concrete block holds shelves very securely — drill through the tile with a diamond or carbide bit, then into the block with a masonry bit and hammer drill, and anchor with masonry anchors. Go slow on the tile glaze to avoid cracking it, and seal holes in wet areas.
- Does Fenelon Handyman install floating shelves?
- Yes — floating shelves, built-ins, mantels, and wall-mounted storage are routine for us across Tampa Bay, on drywall, tile, and concrete block. We anchor into solid framing or block, level everything perfectly, and make sure it holds. Call or text (786) 509-5555.
Want floating shelves installed level and solid — so they're still up next year? Call or text (786) 509-5555 for a fast, insured Tampa handyman. See our carpentry & shelving services.
General Handyman in Tampa, FL
Done-for-you by an insured local crew — free quotes, same-week scheduling.
Need a hand with this in Tampa?
Get a free quote from a 4.8★ local crew. We answer fast and show up on time.
We handle this kind of work across Tampa Bay — including handyman service in Plant City, handyman service in Land O' Lakes, handyman service in Oldsmar and handyman service in Safety Harbor. See all service areas.